
An open-plan room asks its lighting to do two things at once: connect the interior and give each area a clear purpose. The kitchen needs usable task lighting, the dining area needs a focal point, and the seating area should feel comfortable after the meal is over. Making every fixture identical is not the only way to create that connection.
A more flexible approach is to repeat a few visual details while varying scale, shape, and placement. Here is how to coordinate lighting in an open-plan living space without making the whole room feel like one oversized lighting display.
Map the activities before choosing fixtures
Begin with your furniture plan. Mark the kitchen work surfaces, island, dining table, sofa, and reading seats. Then note the main walking routes between them. Lighting should relate to these activities and furnishings rather than simply follow a symmetrical pattern across the ceiling.
Give each zone a clear role. Pendants may define an island, a chandelier can anchor the dining table, and lamps or sconces can bring light closer to a seating area. A decorative fixture does not automatically provide sufficient light for food preparation or reading, so plan those needs separately.
Choose one main visual focal point
When every fixture is large and elaborate, the eye has nowhere to settle. Decide which area should make the strongest statement from the room's main entrance. The dining chandelier is often a useful choice, but a distinctive living-room fixture can lead instead.

The Alabaster Round Chandelier is an example of a fixture with a pronounced material presence. If you choose this type of focal point, quieter silhouettes elsewhere can help the room feel balanced. The product image is a material and styling reference, not a complete lighting plan for an open-plan home.
Repeat a detail rather than an entire design
Look for a shared element across your fixtures: a warm metal finish, a rounded shade, a pale stone texture, or a slim structural line. Repeating one or two of these cues can create continuity without requiring a matching collection.
For example, a brass dining chandelier might relate to simpler pendants with brass accents. Their shapes can differ because the material provides the connection. Compare finish samples where possible; finishes with similar names may have noticeably different undertones or levels of shine.
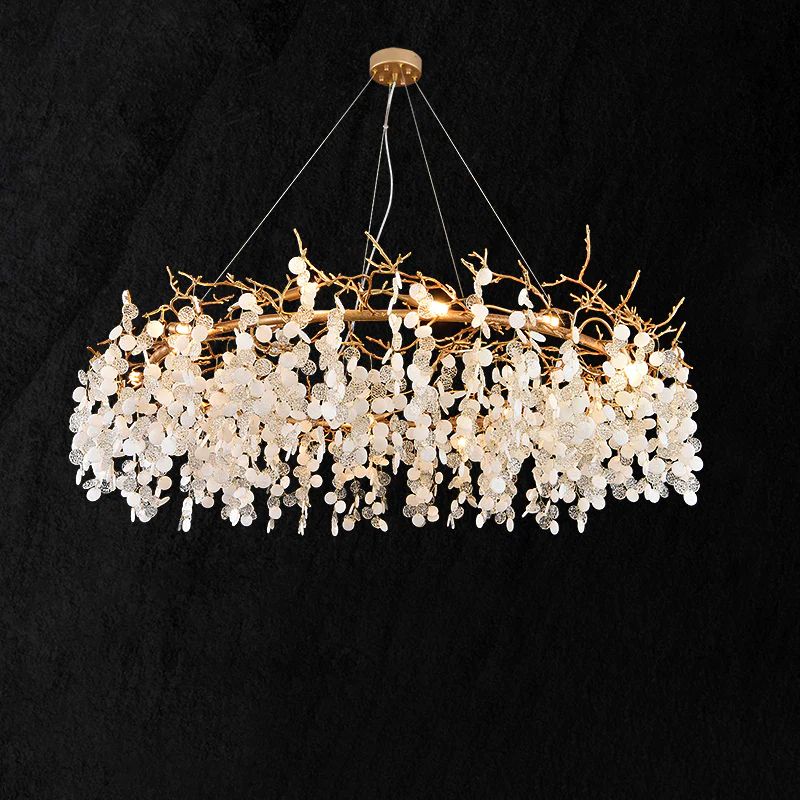
A piece such as the Cathy Round Branch Chandelier can be considered as an alternative dining focal point. There is no need to combine every example in this guide in the same room; choose the option that suits your furniture and overall palette.
Scale each fixture to its own zone
The entire room may be large, but each fixture still needs to fit the furniture below it. Size dining lighting in relation to the table, island pendants in relation to the island and seating, and living-area lighting in relation to the seating arrangement.
Look at the combined view, too. Several medium-size pendants can have as much visual presence as a single chandelier. If both are visible together, adjust their relative scale so they do not compete. Our guide to how many pendant lights to hang over an island explores that grouping decision.
Use consistent light color and flexible layers
Compare the specified color temperature of fixtures visible at the same time. A strong contrast between adjacent light sources can make connected zones feel unrelated even when the finishes match. Test your preferred light color against the actual wall paint, stone, and wood finishes before committing.
Plan separate controls for different activities where the installation allows. You may want the dining area illuminated while reducing light over an unused island. Dimming is useful only when the fixture, light source, and control support it; confirm compatibility rather than assuming all LED lighting is dimmable. Discuss wiring and control choices with a qualified electrician.
Review the room from more than one viewpoint
Walk through the space and sit in the main seats before finalizing placement. Check whether pendants interrupt a view, whether a chandelier feels centered over the table, and whether exposed light sources are uncomfortable from the sofa.
Consider reflections in windows and screens as well as direct glare. A fixture that feels comfortable while standing may appear very different from a low seat. Lighting plans are strongest when they account for how the room is actually used.
Keep the final scheme simple
- Give every fixture a purpose within its own activity zone.
- Choose a primary decorative focal point.
- Repeat selected finishes or shapes for continuity.
- Check scale across the whole room, not only one corner.
- Verify light-source specifications and control compatibility.
For the seating area, continue with our guide to layering living-room lighting. For fixture selection, compare pendant lights and chandeliers. A cohesive open-plan interior does not need identical lighting everywhere; it needs clear priorities and a few well-chosen connections.